Sunday, March 13, 2011

For Kathryn

A few weeks ago my BFF called and asked me to make some cards for her MOPS group auction ( that happens around the middle of March ). I was so flattered- to be asked to so something like this from the Queen of Crafts is very cool ( you should check out her blog www.mycraftyplayground.blogspot.com ). The first thing I asked her was- "Are you sure?" :) Then I took some time to find ideas for sets of cards. Here's what I came up with. I really enjoyed making these card sets. They're simple, but I think they turned out pretty cute!


For this set of cards ( I made two sets of these )- I used the Daisy stamp from SU! Paper and metal embellishments are from SU!, ribbon is from Kathryn ( thanks Kathryn- the colors wer perfect for this! )


Each set of cards had 6 cards with 3 each having a different sentiment- and a different colored ribbon.

This is the sentiment stamped on the inside of 3 of the cards.


With this next set I used an embossing folder from SU! I also made two sets of 6 cards using this style. Each set is divided in half - so 3 cards are blue and 3 are pink each three have a different sentiment.

Here's a close up of the blue one. I used my i-rock jewel setter for this set.


On the pink cards I used my pearls from SU!
I really like how all four sets of cards turned out. I should really start making my cards in sets- it's so much easier that way! :)
A special thanks to Kathryn for giving me the opportunity to craft for such a good cause!


A Reason To Celebrate...

On Saturday, March 5TH and 9:30 p.m ( or so )- my sister delivered her third child! I'm super excited- I LOVE being an AUNT! :) So in celebration of this momentous occasion- I decided to make the following items: Decorated onesies & a framed layout of my sister while she was pregnant.
Okay, here's where I need to be totally honest...I started out with a package of 5 onesies. Much to my annoyance, the purple paint I was using on one of the onesies was too runny ( it was a glittery purple). I didn't know it was too runny until after the image had dried, so I had to toss it. :(
The flower onesie was painted on using a stencil ( which I cut out using my new slice ) made with vinyl. I used the Folk Art brand of acrylic paint.


The teddy bear was a stencil made using the baby cart on the Slice. I think this one is my all time favorite. Paint was Folk Art ( acrylic ).

I stamped this teddy bear using a baby stamp set from SU! (from a few years ago ), ink is momento black, and I colored it with my copic markers.


The giraffe is from the same SU! set. Ink is momento black and colored with my copic markers. Before I colored the images I set them with my heat gun. I found out ( by practicing on an old tee shirt ) that if I didn't set the black ink- then it bled when I used the markers ).


Here's my sister while she was pregnant- I think she looks so beautiful! Most of the printed paper is from SU! Card stock and ribbon are from SU! as well. Flowers are Petal Loos and Prima. Metal accents and movie tickets are Tim Holtz.


Close up of the first part of the title. I used a glitter pen on the brown letters ( Letters cut using Lyrical Letters cartridge for the Cricut ).


It's hard to tell in this photo but I sprayed the letters in Glow with the glittered spritz.


Here's a close up of the flowers , metal accents, and ribbon.
I am so happy with the way this layout turned out. It looks exactly like I pictured it in my head! Which doesn't happen for me that often! After I finished the layout, I went to Michael's and bought a frame for it. After I put the layout inside the frame and propped it up I discovered that the glue dots I used on the key didn't work ( the key fell off ). Next, I tried terrifically tacky tape ( hoping that would work )...about 20 minutes later I heard a clicking noise ( the key fell off again ). So, I guess my next purchase from Michael's is going to be some sort of metal glue ( hopefully, they still carry it! )!


Sunday, February 6, 2011

It's All About The Sisters

It's been awhile since I've scrapped a layout. It felt pretty good to get back in the game. Papers are from The Angel Co. ( the Emma collection ). Title was made using chipboard letters- inked with SU! ink in Tangerine Tango and sprayed with shimmer spray. I took the photo back in October- a photo-shoot of the girls together in their soccer uniforms- I wanted to capture the fun!
The flowers were stamped using the Vintage Vogue set from SU! Inked with Close to Cocoa, Tangerine Tango, and Always Artichoke inks.

Martha Stewart ribbon folded.


Close up of sisters- Love the way the shimmer spray looks on the Tangerine ink!


This stamp is from the Vintage Vogue set as well.


Milk Carton & A Birthday Card

A few weeks ago my son was invited to his friend Sam's birthday party. This is what we made for him-
The images are from The Angel Co. Paper is from SU! Colored using my copic markers.

Inside the card we stuck a gift card for Gamestop ( what else do you get a 12 year old boy?). Inside the milk carton we put a bunch of Hershey's kisses. I made the milk carton using the SU! die. I love that die- it's so fun to use- and it comes together fairly easy.
When Duncan got back from the party he said the card and milk carton were a big hit. :)


Saturday, January 8, 2011

A Tisket, A Tasket, A Little Birthday Basket

Linsea went to a sweet 16 birthday party tonight. We didn't have a lot of money- but we wanted to do something special for her. After all, you only turn 16 once. So, I got online and searched for a basket template. I didn't really find one that appealed to me. Next, I looked through my saved files and found one that looked like this one. I had a problem. I don't have a 12"x12" printer. I should invest in one. I figured that 81/2"x11" wouldn't make a basket big enough for what I had in mind. So, I eye-balled it. Go me. I started out with a 12"x12" piece of cardstock- and it worked! But, the basket was bigger than I needed. So, I went smaller- and with the help of my husband ( who is awesome at craft math)- sized it down to my needs. :)
I filled the basket with little candy wrapper treat boxes filled with chocolates ( Stampin' Up carries this Sizzix die). The red candy wrapper box is made with SU! cardstock-dry embossed with a Sizzix folder, then inked with white craft ink.

This one is made with craft carstock (from Stampin' Up), dry embossed with Sizzix folder ( also from SU!), and inked with white craft ink.


I attached brown and white polka dot paper ( designer series from SU!- a few years ago) to the treat box.


I attached SU! designer paper to this one as well- from the same paper package as the brown paper.


Here's what they all look like inside ( close up) the basket.


This was my first try. I think I'm going to do this again. Maybe for Easter baskets for the kids this year. Maybe even one for Marcia ( Emma's piano teacher) on/for Valentines Day. She's such a nice lady and she deserves a bunch of sweetness in her life.
It's been a really long day- I think it's time for a cuppa cocoa and a good book before bed. Thanks for stopping by. Have a fun and crafty weekend!


Thursday, January 6, 2011

More Snow & Some Yummy Treats

I had so much fun making my snow decorations! With this set I painted the wood white again. Next I added printed paper by Imaginisce ( so far I think this set of paper is my all time favorite Christmas print!).
I used my Cricut Expression again and the All Mixed Up Cartridge for the font. This time I added buttons from my stash for a more 3D visual.

This cute little guy is from the same CTMH stamp set. One of my all time favorite snowmen sets!


This is Miss Marcia's ( Emma's piano teacher and a very awesome lady) Christmas treat. We bought a glass Irish coffee mug. I etched her initial on it and filled it with some chocolate,white chocolate pretzel sticks, Godiva chocolate, Starbucks instant coffee, and some miniature dark Hershey's chocolate. Definitely a tasty treat. Something I wouldn't mind receiving myself. :)


Here's the close up of her initial- this font can be found on the Woodland Winter Cartridge. I love how elegant it makes the glass look. I'd like to see if I can find some more of these Irish coffee cups. I want do etch our initials on them.
Well, I'm off to help Linsea make an album for her Japanese class project. Thanks for stopping by.


Wednesday, January 5, 2011

Feels Like....

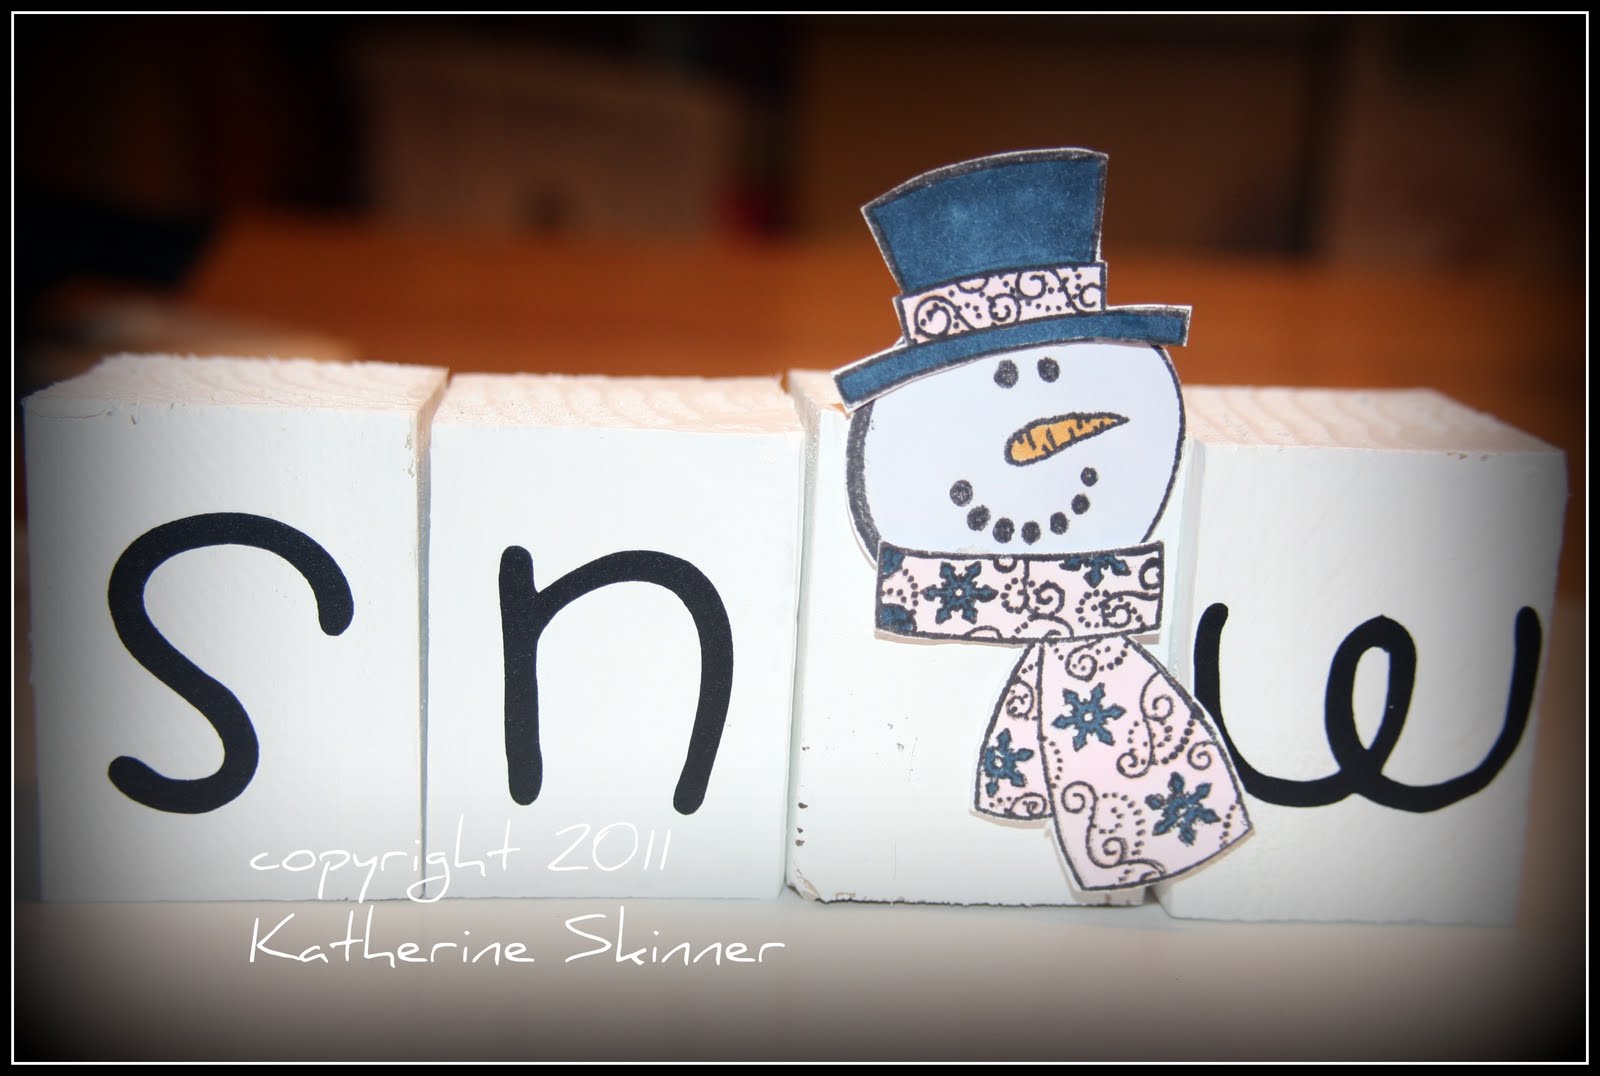
It really does feel like snow. BRRRR. I am so ready for spring. I miss the flowers. The sunshine. The non-freezing temperatures.For this project I used small pieces of wood that I painted white. After they dried ( okay- they weren't completely dried- so the vinyl didn't stick at all well- you should wait for it to dry, really.) I used vinyl and my cricut ( with the all mixed up cartridge for the font).

Here's a close up of the snowman. He's from CTMH and I colored him with my copic markers.
This was my first try at this type of project. I really like being able to replace a letter ( like the O in snow) with an image. Now, I'm trying to figure out other words I can do. This was a quick, easy and fun project and I can't wait to try it again.