Sunday, February 6, 2011

It's All About The Sisters

It's been awhile since I've scrapped a layout. It felt pretty good to get back in the game. Papers are from The Angel Co. ( the Emma collection ). Title was made using chipboard letters- inked with SU! ink in Tangerine Tango and sprayed with shimmer spray. I took the photo back in October- a photo-shoot of the girls together in their soccer uniforms- I wanted to capture the fun!
The flowers were stamped using the Vintage Vogue set from SU! Inked with Close to Cocoa, Tangerine Tango, and Always Artichoke inks.

Martha Stewart ribbon folded.


Close up of sisters- Love the way the shimmer spray looks on the Tangerine ink!


This stamp is from the Vintage Vogue set as well.


Milk Carton & A Birthday Card

A few weeks ago my son was invited to his friend Sam's birthday party. This is what we made for him-
The images are from The Angel Co. Paper is from SU! Colored using my copic markers.

Inside the card we stuck a gift card for Gamestop ( what else do you get a 12 year old boy?). Inside the milk carton we put a bunch of Hershey's kisses. I made the milk carton using the SU! die. I love that die- it's so fun to use- and it comes together fairly easy.
When Duncan got back from the party he said the card and milk carton were a big hit. :)


Saturday, January 8, 2011

A Tisket, A Tasket, A Little Birthday Basket

Linsea went to a sweet 16 birthday party tonight. We didn't have a lot of money- but we wanted to do something special for her. After all, you only turn 16 once. So, I got online and searched for a basket template. I didn't really find one that appealed to me. Next, I looked through my saved files and found one that looked like this one. I had a problem. I don't have a 12"x12" printer. I should invest in one. I figured that 81/2"x11" wouldn't make a basket big enough for what I had in mind. So, I eye-balled it. Go me. I started out with a 12"x12" piece of cardstock- and it worked! But, the basket was bigger than I needed. So, I went smaller- and with the help of my husband ( who is awesome at craft math)- sized it down to my needs. :)
I filled the basket with little candy wrapper treat boxes filled with chocolates ( Stampin' Up carries this Sizzix die). The red candy wrapper box is made with SU! cardstock-dry embossed with a Sizzix folder, then inked with white craft ink.

This one is made with craft carstock (from Stampin' Up), dry embossed with Sizzix folder ( also from SU!), and inked with white craft ink.


I attached brown and white polka dot paper ( designer series from SU!- a few years ago) to the treat box.


I attached SU! designer paper to this one as well- from the same paper package as the brown paper.


Here's what they all look like inside ( close up) the basket.


This was my first try. I think I'm going to do this again. Maybe for Easter baskets for the kids this year. Maybe even one for Marcia ( Emma's piano teacher) on/for Valentines Day. She's such a nice lady and she deserves a bunch of sweetness in her life.
It's been a really long day- I think it's time for a cuppa cocoa and a good book before bed. Thanks for stopping by. Have a fun and crafty weekend!


Thursday, January 6, 2011

More Snow & Some Yummy Treats

I had so much fun making my snow decorations! With this set I painted the wood white again. Next I added printed paper by Imaginisce ( so far I think this set of paper is my all time favorite Christmas print!).
I used my Cricut Expression again and the All Mixed Up Cartridge for the font. This time I added buttons from my stash for a more 3D visual.

This cute little guy is from the same CTMH stamp set. One of my all time favorite snowmen sets!


This is Miss Marcia's ( Emma's piano teacher and a very awesome lady) Christmas treat. We bought a glass Irish coffee mug. I etched her initial on it and filled it with some chocolate,white chocolate pretzel sticks, Godiva chocolate, Starbucks instant coffee, and some miniature dark Hershey's chocolate. Definitely a tasty treat. Something I wouldn't mind receiving myself. :)


Here's the close up of her initial- this font can be found on the Woodland Winter Cartridge. I love how elegant it makes the glass look. I'd like to see if I can find some more of these Irish coffee cups. I want do etch our initials on them.
Well, I'm off to help Linsea make an album for her Japanese class project. Thanks for stopping by.


Wednesday, January 5, 2011

Feels Like....

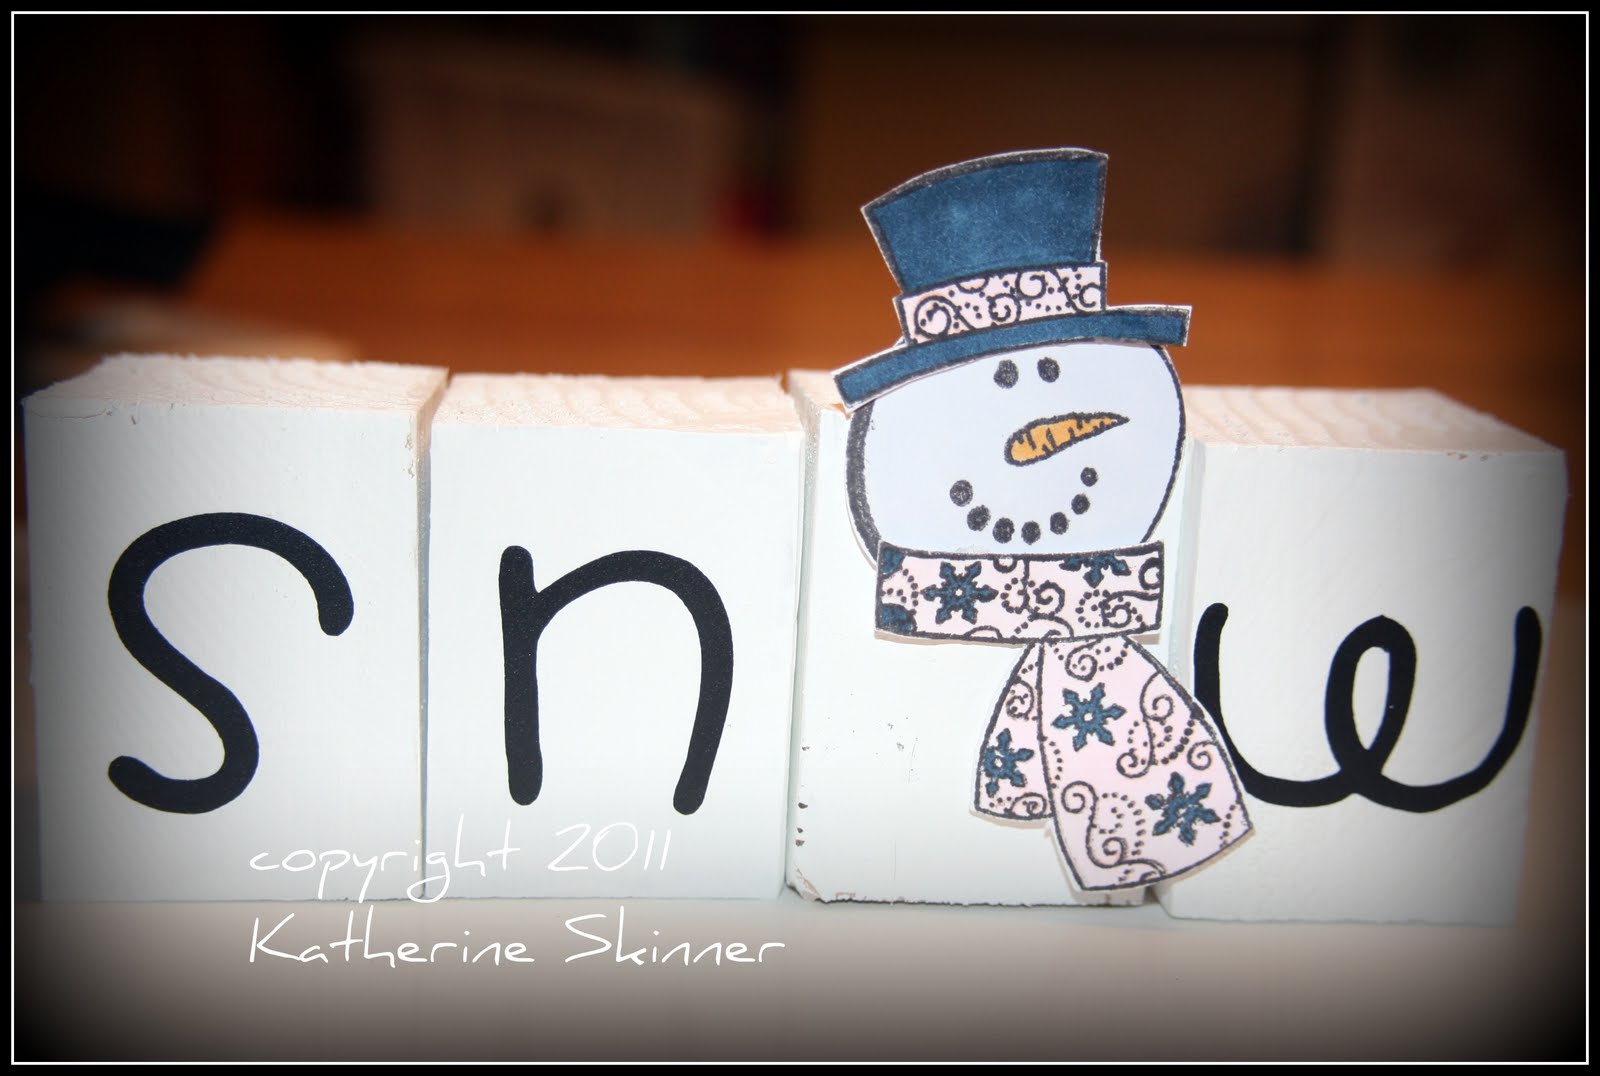
It really does feel like snow. BRRRR. I am so ready for spring. I miss the flowers. The sunshine. The non-freezing temperatures.For this project I used small pieces of wood that I painted white. After they dried ( okay- they weren't completely dried- so the vinyl didn't stick at all well- you should wait for it to dry, really.) I used vinyl and my cricut ( with the all mixed up cartridge for the font).

Here's a close up of the snowman. He's from CTMH and I colored him with my copic markers.
This was my first try at this type of project. I really like being able to replace a letter ( like the O in snow) with an image. Now, I'm trying to figure out other words I can do. This was a quick, easy and fun project and I can't wait to try it again.

Wednesday, December 29, 2010

Bringing you sunbursts

I've spent the better part of the last two days working on this Sunburst album.- It actually took me a little longer- because I had to search out the directions for it... Anyhow, I added the finishing touches to the cover this morning. Over all, I am really pleased with the way this turned out- especially for my first "real" try. I made a template out of regular cardstock- just to make sure I could do it. I hate wasting my favorite paper, and since I know that my learning curve is high- I know better than to use any favorite paper the first time around.


There are seven pockets and each pocket holds a tag- that gives you fourteen "pages" to design. I only used seven for pictures- and the backs I decided to use for journaling.

I used my bind it all to hold it together- actually, all the paper together was too thick and it wouldn't find inside the BIA slot- so I thought outside the box and marked the holes where the BIA would punch and used my cropadile to punch the holes ( though, it was almost too thick for that too!). Then I placed the O-Rings through the holes and bound them together using the binding part of the BIA. Next time I try this, I won't use such thick cardstock. For this one I used SU! cardstock and My Mind's Eye double sided cardstock ( which is also very thick).


I used flowers made from SU! cardstock ( which made the opening very bulky)- I enhanced them with some white flowers from my stash- seven of the flowers I stickled with Tim Holtz distressed orange.


This is my son- posing dramatically for his birthday photo shoot. I love it when he acts like this- it's nice to be able to get a "real" smile instead of the " I'm being tortured" smile.


I stamped the back of most the tags using some of my Unity Stamps. I tried to journal on the back of each picture- I was only partially successful- it is such a challenge for me to put it down on paper.
Well, I'm sitting here getting cold- I think it's time to make nice warm mocha and get ready to call it a day. Thanks for stopping by. :)

Oh, yeah...before I forget- here's where I found the directions:
She's a neat lady with some really great ideas!


Monday, December 27, 2010

Halloween Party Decorations & Favors

October 27TH is my daughter, Emma's s birthday. This year she decided she wanted to have a slumber party. Since her birthday is so late in October and we usually celebrate on a weekend ( if her birthday falls during the week), she decided on a Halloween themed party. So, like the good mom I try to be- I did some research on handmade Halloween decorations and treats. I found a lot of good articles and ideas in a Disney magazine ( I still can't believe I paid $10 for it- I'm thinking of having it bronzed).
The first thing I did was make her a birthday banner. For this project I used my Cricut, black paper, Halloween themed paper from my stash, green ribbon, and the Jasmine cart ( I couldn't find my street signs cart- where I know there is a triangle shape- so the Jasmine cartridge has a nice diamond shape-. The diamond shaped looked better than I thought it would ( good enough that my sister, Sarah wanted a banner made for her birthday too- also in Oct.)

I saw these cute little mummy containers in the Disney magazine- but they were made using toilet paper rolls ( or you could have used paper towel rolls)- I didn't have enough of either one- and I really liked the way they looked. Then I remembered I saw something similar in the SU! catalog- they made theirs using a can and natural ribbon. I took mine one step further- I used gauze, pint sized mason jars and googly eyes. They were a big hit with all the girls!

Here's a close up of the tag I made- the stamps are from The Angel Co.- on the back of each I wrote one of the girl's name.

Here's a close up of the front of the mummy jar. I really wish I would have made one for myself! :)


These are mummy cookie pops. Made with Oreo cookies dipped in melted vanilla chips ( the one's from Wilton- I think next time I'll try using regular white baking chips). These were also a big hit.


Here's a close up of the mummy cookie pop.


Here are my Daddy Long leg cupcakes. I didn't buy enough string black licorice ( that stuff is so nasty smelling)- so I only made a few. Turns out that it worked much better that way-because as it was some of them fell out of the cupcake holder.


Isn't he cute? The cupcake idea also came from the Disney magazine. I made mummy hot dogs ( seemed like the theme was more mummy-ish than Halloween)- but the girls ate them all before I could snap a picture of them.- Oh, before I forget, his eyes are made using those old fashioned Necco candies- and a small drop of black gel. Next time I'll try frosting instead. The gel didn't really set well.
The party was a success. Though, 5 little girls ( all 10 and 11) make a lot of noise!!! I've decided that when you get a group of girls together- it's called a "Giggle" of girls. Cause that's all they do is giggle!