Tuesday, May 31, 2011

For Sarah

My sister called yesterday with a crock pot question. From that we meandered to the comment I owed her a Dry Erase Menu Board. Apparently, I got her confused with my other sister, who said she wouldn't use it. Bad Me. Bad.

Her kitchen colors can only be described as Sante Fe. So, here's my attempt at making her menu board in Sante Fe type colors. Not too bad. Maybe even AWESOME since I didn't have to go out a buy paper especially for this project...and I don't typically have these colors on hand. GO ME. Sometimes, it does pay to NOT throw things out. Yeah. That's. It. :)

So, my dear, sweet, sister....here's your menu board. Use it in good health. Big Hugs.

Monday, May 23, 2011

Easter Buckets..An Alternative To Easter Baskets

I have to say- I love these little plastic buckets. I found them at Michael's for $3.99 each ( so they were considerably less expensive than a "real" Easter Basket. I think my favorite thing about them is that they were not the big gallon size... they were tall and skinny.
I took 3 different pieces of printed paper ( one for each kid ). I cut the 12" piece of paper in half and then took my punch and edged 2 of the 3 borders ( couldn't have a girly look for my son ).


I took a circle Nestability and cut a circle out of each piece of paper for the lids. I made brownies in Mason Jars for the kids as well ( this is what I decided to do- mostly because money has been a little tight recently...everything is getting more and more expensive- thank you inflation). They were really yummy- I put a Reese's Peanut Butter Egg inside each of them ( I love peanut butter and chocolate)! After they were devoured, the kids looked around for more.
I actually made "brownie cupcakes" with the leftover brownie mix. After I took them out of the oven- I stuck Reese's Peanut Butter Eggs in each. Yum yummy.


Magnetic Memo Boards: An Inexpensive and Practical Gift Idea

I love Magnetic Memo Boards. REALLY. You could say they're the gift you give that someone who already had everything. They also make excellent birthday gifts ( for girls anyway). I also love the fact that they are so inexpensive to make{yet they don't look cheesy}. For these projects- I had nearly all the supplies I needed to complete each memo board. In a couple of cases I did have to go out and get ribbon- but that was even pretty inexpensive, as I used my 40% off Michael's coupon.


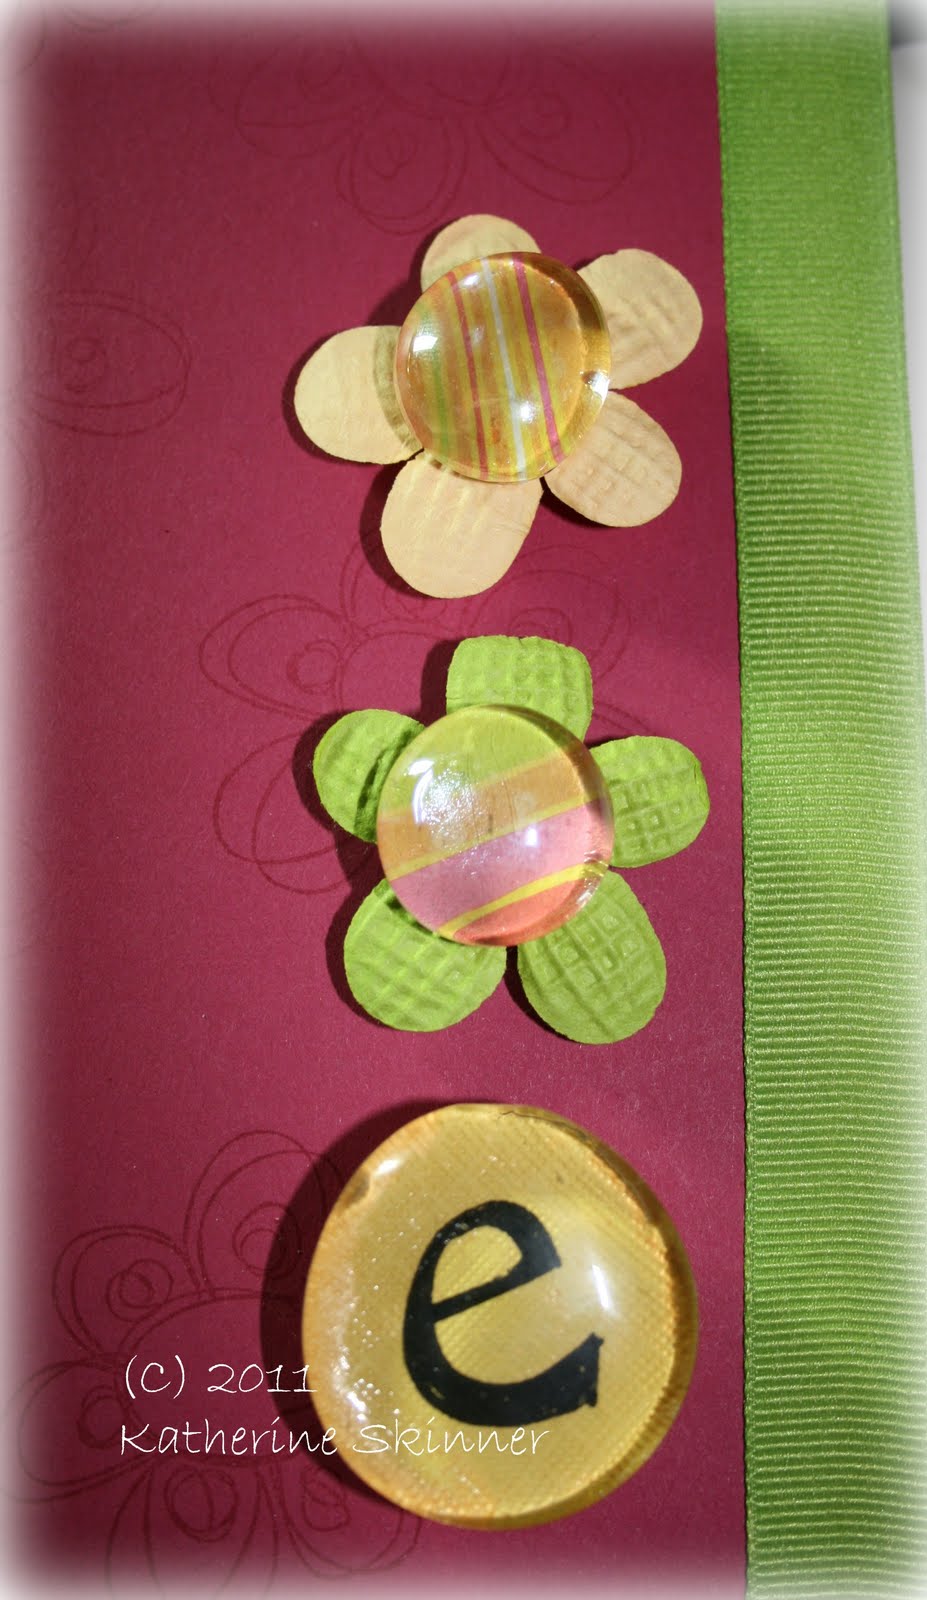
I made this one for Emma's Piano Teacher, Marcia. I was really pleased with this "grown up version". I was amazed when I found this lined paper in my stash. I also used my Cricut Expression and the cart with all the music on it ( I'm not home right now and I can't remember what it's called). I used the flat glass marbles ( you can get them at Michael's or the dollar store), rub-ons for the initial. Prima flowers were also used with the marbles. They make excellent magnets ( magnets can be found at Michael's or Joann's).

Here's a close up of some of the magnets. I made 6- 3 for each side of the memo board.


This is my daughter Emma's- once we got started making these memo boards, she decided she needed one too. These are the colors she chose to use. Definitely not my color choice. She's pleased with it though, and that's all that really matters.


The paper she chose came from her American Girl Paper Pack. I used some SU! card stock as well.


Flowers are from Prima. Marbles are from Michael's. I used rub-ons for her intial.


This one was made for my daughter Linsea's friend Kristie. She recently moved and painted her room purple. Linsea's decided that this would make an excellent birthday present for her. Paper and cs is from SU! ( paper pack was from a few seasons ago).


Here's a close up of her name. I love having a Cricut. This project would have been so much more painful without it.


Close up of the magnets I did. The flower is from Prima. I actually made 6 magnets- 3 for each side. 2 flowers, 2 initials, and 2 small ones.


I have another one to share. But, that will have to wait for another day. I have the photos, but they haven't been edited. I'm lazy that way. In fact, I have been crafting- but not posting- mostly because I haven't been able to find the time or energy for editing, and I hate sharing nasty, unedited pictures. Anyhow, I've been asked for a tutorial. So, I'll probably work one up here pretty soon. Hope you are all having a wonderful, productive day. Thanks for Stopping by.

Katherine


Sunday, March 13, 2011

For Kathryn

A few weeks ago my BFF called and asked me to make some cards for her MOPS group auction ( that happens around the middle of March ). I was so flattered- to be asked to so something like this from the Queen of Crafts is very cool ( you should check out her blog www.mycraftyplayground.blogspot.com ). The first thing I asked her was- "Are you sure?" :) Then I took some time to find ideas for sets of cards. Here's what I came up with. I really enjoyed making these card sets. They're simple, but I think they turned out pretty cute!


For this set of cards ( I made two sets of these )- I used the Daisy stamp from SU! Paper and metal embellishments are from SU!, ribbon is from Kathryn ( thanks Kathryn- the colors wer perfect for this! )


Each set of cards had 6 cards with 3 each having a different sentiment- and a different colored ribbon.

This is the sentiment stamped on the inside of 3 of the cards.


With this next set I used an embossing folder from SU! I also made two sets of 6 cards using this style. Each set is divided in half - so 3 cards are blue and 3 are pink each three have a different sentiment.

Here's a close up of the blue one. I used my i-rock jewel setter for this set.


On the pink cards I used my pearls from SU!
I really like how all four sets of cards turned out. I should really start making my cards in sets- it's so much easier that way! :)
A special thanks to Kathryn for giving me the opportunity to craft for such a good cause!


A Reason To Celebrate...

On Saturday, March 5TH and 9:30 p.m ( or so )- my sister delivered her third child! I'm super excited- I LOVE being an AUNT! :) So in celebration of this momentous occasion- I decided to make the following items: Decorated onesies & a framed layout of my sister while she was pregnant.
Okay, here's where I need to be totally honest...I started out with a package of 5 onesies. Much to my annoyance, the purple paint I was using on one of the onesies was too runny ( it was a glittery purple). I didn't know it was too runny until after the image had dried, so I had to toss it. :(
The flower onesie was painted on using a stencil ( which I cut out using my new slice ) made with vinyl. I used the Folk Art brand of acrylic paint.


The teddy bear was a stencil made using the baby cart on the Slice. I think this one is my all time favorite. Paint was Folk Art ( acrylic ).

I stamped this teddy bear using a baby stamp set from SU! (from a few years ago ), ink is momento black, and I colored it with my copic markers.


The giraffe is from the same SU! set. Ink is momento black and colored with my copic markers. Before I colored the images I set them with my heat gun. I found out ( by practicing on an old tee shirt ) that if I didn't set the black ink- then it bled when I used the markers ).


Here's my sister while she was pregnant- I think she looks so beautiful! Most of the printed paper is from SU! Card stock and ribbon are from SU! as well. Flowers are Petal Loos and Prima. Metal accents and movie tickets are Tim Holtz.


Close up of the first part of the title. I used a glitter pen on the brown letters ( Letters cut using Lyrical Letters cartridge for the Cricut ).


It's hard to tell in this photo but I sprayed the letters in Glow with the glittered spritz.


Here's a close up of the flowers , metal accents, and ribbon.
I am so happy with the way this layout turned out. It looks exactly like I pictured it in my head! Which doesn't happen for me that often! After I finished the layout, I went to Michael's and bought a frame for it. After I put the layout inside the frame and propped it up I discovered that the glue dots I used on the key didn't work ( the key fell off ). Next, I tried terrifically tacky tape ( hoping that would work )...about 20 minutes later I heard a clicking noise ( the key fell off again ). So, I guess my next purchase from Michael's is going to be some sort of metal glue ( hopefully, they still carry it! )!


Sunday, February 6, 2011

It's All About The Sisters

It's been awhile since I've scrapped a layout. It felt pretty good to get back in the game. Papers are from The Angel Co. ( the Emma collection ). Title was made using chipboard letters- inked with SU! ink in Tangerine Tango and sprayed with shimmer spray. I took the photo back in October- a photo-shoot of the girls together in their soccer uniforms- I wanted to capture the fun!
The flowers were stamped using the Vintage Vogue set from SU! Inked with Close to Cocoa, Tangerine Tango, and Always Artichoke inks.

Martha Stewart ribbon folded.


Close up of sisters- Love the way the shimmer spray looks on the Tangerine ink!


This stamp is from the Vintage Vogue set as well.


Milk Carton & A Birthday Card

A few weeks ago my son was invited to his friend Sam's birthday party. This is what we made for him-
The images are from The Angel Co. Paper is from SU! Colored using my copic markers.

Inside the card we stuck a gift card for Gamestop ( what else do you get a 12 year old boy?). Inside the milk carton we put a bunch of Hershey's kisses. I made the milk carton using the SU! die. I love that die- it's so fun to use- and it comes together fairly easy.
When Duncan got back from the party he said the card and milk carton were a big hit. :)